Google play console configuration for IAP, Part 1
No doubt, configuring In-app purchase inside google play console is a long, tiresome process. This is particularly true if you are just starting out or new to this In-app purchase world. I will try my best to explain the steps needed for the configuration of in app
purchase. From now on we will call this IAP as this saves some typing for me, hope you guys don't mind on that.
However, covering the full procedure in a single post is not going to be suitable for readers. That's why I am breaking the full procedure in a series of posts and this article is the first one of them.
What I am not going to discuss or write about
What this post is about
Prerequisite
However, covering the full procedure in a single post is not going to be suitable for readers. That's why I am breaking the full procedure in a series of posts and this article is the first one of them.
To successfully
test & publish app with in app purchase, we need to do following
- Download and integrate in app billing library inside the code of your android app
- Upload that app to play console
- Configure for in app purchase inside play console
- Setup sandbox/test environment in order to test the app with IAP
What I am not going to discuss or write about
- How to code or integrate in app purchase
- How to set up an app inside play console.
- How to fill up store presence details of an app inside play console.
What this post is about
- Configuration for IAP inside play console
- Setting up sandbox/test environment in order to test the app with IAP
Prerequisite
- You have already built your apk file with in app billing code integrated
- You already have a google play account & have access to play console
- You have already created an app, fill out all the details for that app in play console.
So, without
any delay, let’s get started.
Uploading app to play console:
Uploading app to play console:
- Login to play console
- Select Your App
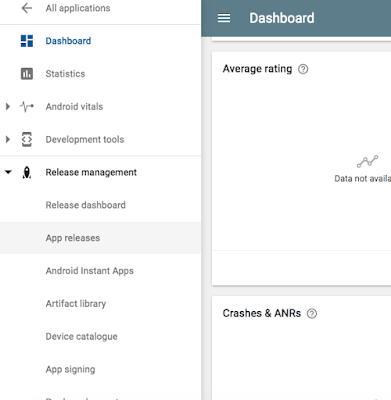
- From left side menu, go to app release menu under Release Management
- Scroll down to Internal test track, click manage
- Scroll down to Manage Testers, click create new list
- Give the list a name, add as many test user email account as you want. You can add maximum 100 users. Click the create button once you are done.
- Go to create release section, click "Create Release" button
- Select "Browse files", select your apk from wherever you stored it. Once you are done with selection, upload will begin automatically. When the upload is done , play console will further process the apk. Hopefully it will go alright if everything is okay with your apk.
- Once upload is done, play console will greet you with "Upload success" message.
- Fill up all other information(Ex: Release Name,What's new in this release) of this page and then click save.
- Once all information along with apk is saved , click "Review" button. Play console will review your apk . It will show any warning or error , if there is any. Otherwise you will see a big roll-out button there . Click on that button and your app will be available for internal test
- Change version code
- Change version name
- Use same key-store signature which is used for the app in play store
- select both v1(jar signature) & v2(full apk signature) when generating signed build


Comments
Post a Comment